
Salads
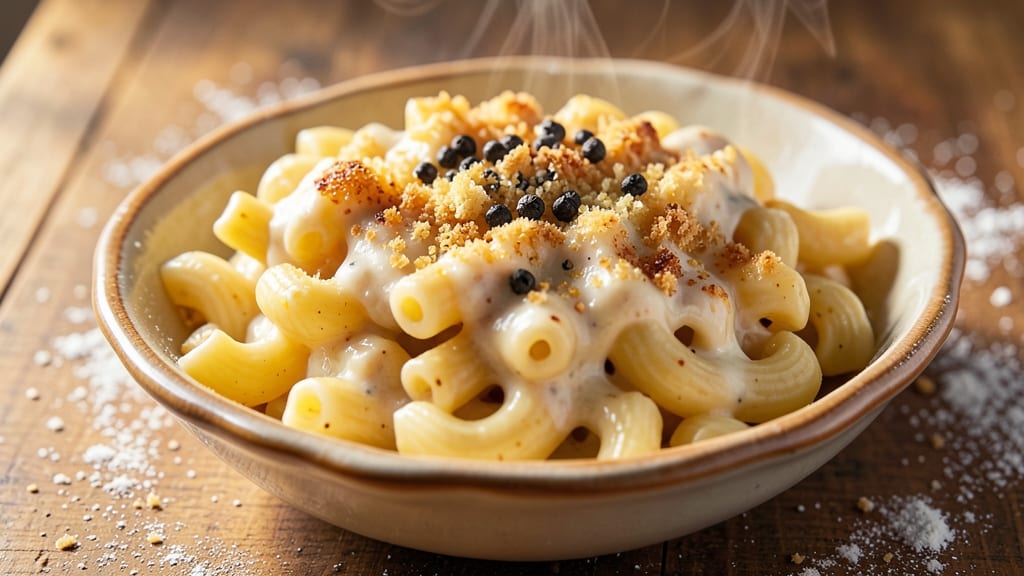
This Asiago macaroni and cheese recipe delivers the perfect balance of creamy, bubbly goodness that transforms a simple weeknight dinner into a comforting masterpiece. The secret lies in a rich, velvety cheese sauce made with sharp Asiago, which adds a nutty depth that sets it apart from classic cheddar versions.
I developed this recipe after years of testing—each adjustment refined to ensure the sauce stays perfectly smooth while the pasta remains al dente, never mushy.
The process is straightforward but precise: cook the pasta just shy of al dente, then blend the cheese sauce in a way that eliminates lumps while preserving that signature creamy texture.
A touch of mustard powder and a splash of milk create the ideal tanginess, while a sprinkle of breadcrumbs on top adds a satisfying crunch that contrasts beautifully with the melt-in-your-mouth cheese. This isn’t just mac and cheese—it’s a restaurant-quality dish that’s foolproof for home cooks.
What makes this recipe stand out is how the Asiago’s sharp, slightly sweet flavor cuts through the richness, creating a sauce that’s both indulgent and balanced. The result is a dish with golden, bubbling cheese on top, tender pasta underneath, and a sauce so creamy it coats every noodle perfectly.
It’s the kind of meal that feels like a hug in food form—warm, comforting, and impossible to resist.
Serve it as a main dish with a crisp green salad or roasted vegetables, or turn it into a crowd-pleasing appetizer by shaping it into individual cups. The leftovers reheat beautifully, making it ideal for meal prep. Ready to master this creamy, cheesy delight? Let’s get started.
Ingredients for asiago macaroni and cheese
Twelve ingredients transform into a velvety Asiago macaroni and cheese masterpiece with nutty depth and bubbly perfection.
| Ingredient | Amount | Notes |
|---|---|---|
| Elbow Macaroni 🍝 | 12 oz | Dry pasta, al dente preferred |
| Asiago Cheese 🧀 | 2 cups | Freshly grated, sharp variety |
| Sharp White Cheddar Cheese 🧀 | 1 cup | For extra depth of flavor |
| Whole Milk 🥛 | 2 cups | Full-fat for creaminess |
| Unsalted Butter 🧈 | 6 tbsp | Cold, cut into small cubes |
| All-Purpose Flour 🌾 | 2 tbsp | For thickening sauce |
| Mustard Powder 🌶️ | 1 tsp | For subtle tang |
| Diamond Crystal Kosher Salt 🧂 | 1 ½ tsp | Adjust to taste |
| Freshly Ground Black Pepper 🌶️ | ½ tsp | Freshly cracked preferred |
| Panko Breadcrumbs 🍞 | ¼ cup | For crispy topping |
| Garlic Cloves 🧄 | 2 cloves | Minced, for flavor depth |
| Extra-Virgin Olive Oil 🫒 | 1 tbsp | For pasta tossing |
| Freshly Squeezed Lemon Juice 🍋 | 1 tsp | Brightens flavor profile |
The cheese selection is non-negotiable for this recipe. Asiago must be freshly grated—pre-shredded clumps and loses its sharp, nutty complexity. For the best results, buy a wedge from a specialty cheese shop or the deli counter at Whole Foods, where they'll grate it fresh to order. Pair it with sharp white cheddar for that signature tang, and always opt for the full-fat versions—low-fat cheeses simply can't achieve the same creamy texture. The Diamond Crystal kosher salt is another key player; it dissolves more easily than table salt, ensuring perfect seasoning without graininess.
No freshly grated Asiago? Parmigiano-Reggiano works in a pinch, though it lacks the signature sweetness. Substituting the milk? Heavy cream makes the sauce richer, but whole milk delivers that perfect balance of creaminess and lightness. The mustard powder is essential—it cuts through the richness, so don't skip it. For the breadcrumbs, panko is ideal, but regular breadcrumbs work if you toast them first in a dry pan for added crunch. The garlic can be omitted if you're sensitive to its flavor, but trust me on keeping it—it adds depth that elevates the entire dish.
This dish reheats beautifully—better the second day, as the flavors meld and the sauce becomes even silkier. Store leftovers covered in the fridge for up to 4 days, or freeze portions for 3 months in airtight containers. For meal prep, assemble the dish without baking it first—this keeps the pasta from turning mushy when reheated. When ready to serve, simply bake until bubbly and golden. The breadcrumb topping stays crispy if you broil it for the final 2 minutes, so keep an eye on it to avoid burning.
Why You'll Love This Recipe
- Here’s what sold me: it’s ridiculously affordable but tastes like a restaurant dish. Asiago’s a little pricier, but a small block stretches forever when mixed with chedddar. Plus, whole milk and butter keep it rich without breaking the bank—my wallet and taste buds win.
- One-Pot Magic: I swear by this recipe—just toss the pasta, cheese, and milk in one pot, stir, and walk away. No straining, no extra bowls, no stress. The elbow macaroni soaks up that rich Asiago-cheddar sauce like a dream, and the butter keeps it silky without a drop of flour.
- Nutty, Sharp Bite: That combo of Asiago and sharp white chedddar? Chef’s kiss. The Asiago brings this deep, toasty nuttiness while the cheddar adds that tangy punch—every bite feels like a little flavor explosion. Honestly, I’ve tried fancier versions, but this one hits harder.
- Lunchbox Hero: Between us, this is my go-to for meal prep. I make a big batch on Sundays, portion it into containers, and it stays creamy and delicious for days. Kids (and adults) grab it for work or school—no sad, soggy leftovers here.
Step-by-step instructions for Asiago macaroni and cheese
This method delivers creamy, bubbly mac and cheese with a crispy breadcrumb topping and perfect al dente pasta.
Cook the Pasta to Al Dente Perfection
Bring a large pot of water to a rolling boil and add 12 oz elbow macaroni. Season generously with 1 tsp Diamond Crystal Kosher Salt—the water should taste like the sea. Cook until 1 minute before the package's suggested al dente time, typically 8-10 minutes.
Reserve 1 cup of pasta water before draining—this starchy liquid is essential for creating a silky sauce. Drain the pasta but don't rinse it; the surface starch helps the cheese adhere. Toss the hot pasta immediately with 1 tbsp extra-virgin olive oil to prevent sticking and enhance flavor.
Create the Cheese Sauce Foundation
In a large, heavy-bottomed saucepan, melt 6 tbsp unsalted butter over medium heat until foaming subsides. Whisk in 2 tbsp all-purpose flour and cook for 1-2 minutes until the mixture forms a smooth, pale roux. This step is critical—don't let it brown or it will taste bitter.
Gradually whisk in 2 cups whole milk, adding it slowly to prevent lumps. Stir constantly as the mixture thickens to a smooth consistency, about 3-4 minutes. Remove from heat and stir in 1 tsp mustard powder, 1.5 tsp Diamond Crystal Kosher Salt, and 0.5 tsp freshly ground black pepper.
Combine Cheeses for Maximum Flavor
Return the saucepan to low heat and gradually add 2 cups freshly grated Asiago cheese and 1 cup sharp white cheddar cheese, whisking constantly. The cheese should melt completely, creating a velvety sauce. If the sauce thickens too much, whisk in reserved pasta water 1 tbsp at a time until smooth.
Stir in the cooked pasta and 1 tsp freshly squeezed lemon juice. The acidity brightens the rich cheese flavors and prevents the sauce from becoming too heavy. Taste and adjust seasoning—you may need a pinch more salt or pepper depending on your cheeses.
Prepare the Crispy Breadcrumb Topping
Preheat your oven to 375°F. In a small bowl, combine 0.25 cup Panko breadcrumbs with 1 tbsp melted butter and 1 tsp minced garlic cloves. Mix until evenly coated—this ensures even browning and maximum crispiness.
Transfer the macaroni and cheese to a greased 8x8-inch baking dish. Spread evenly and sprinkle the breadcrumb mixture evenly over the top. Bake for 15-20 minutes until the top is deep golden brown and the edges bubble slightly.
Broil for Extra Crispiness (Optional)
For an extra crispy topping, transfer the baking dish to the broiler for 1-2 minutes, watching carefully to prevent burning. The breadcrumbs should turn a rich golden brown and develop a crisp texture. Remove from the oven and let rest for 5 minutes before serving.
Serve immediately while the sauce is bubbly and the breadcrumbs are crisp. The pasta should be al dente with a creamy, cheesy coating that clings perfectly to each strand. The lemon juice adds a subtle brightness that cuts through the richness, making each bite balanced and delicious.
Pro Tips For Making Asiago Macaroni And Cheese
- Melt Cheese Slowly: Start with a low simmer—too much heat turns the cheese into a greasy mess instead of a creamy sauce. I learned this the hard way after watching my first batch separate like oil and water.
- Grate Cheese Fresh: Pre-shredded cheese has anti-caking agents that make the sauce grainy. Grab a box of block Asiago and sharp cheddar, and grate it yourself—it’s worth the extra 2 minutes.
- Salt the Pasta Water: If you skip this, your mac and cheese will taste bland no matter how much cheese you add. Salt the pasta water like the sea, and taste it before draining—it should be actually salty.
- Use Whole Milk Sparingly: Whole milk thins the sauce, but too much makes it watery. Start with just enough to loosen the cheese, then add more as needed—you can always thicken it later with a splash of pasta water.
Essential equipment for perfect results
Heavy-Bottomed Saucepan
Your 3-quart stainless steel saucepan is non-negotiable for this recipe—I use my All-Clad 3.5-quart for its even heat distribution. The heavy base prevents hot spots that can scorch your cheese sauce, while the sloped sides make whisking easier.
If you're on a budget, a Cuisinart MultiClad Pro delivers similar performance for less. Avoid thin aluminum pans—they heat unevenly and can create lumps in your sauce. 🔥
Whisk with Fine Wires
Invest in a balloon whisk with at least 12 inches of wire—I swear by the OXO Good Grips model. The fine wires cut through cheese clumps effortlessly, creating a silky texture. For the roux stage, a flat whisk works better to spread the butter evenly.
If you're making this frequently, consider a hand mixer with whisk attachment for the milk incorporation step—it saves time without sacrificing quality.
Cheese Grater
A box grater with microplane sides
is essential for freshly grating Asiago. I prefer the Microplane Classic—it produces fine, even shreds that melt beautifully. For the white cheddar, a hand crank grater like the Kitchenaid works well if you're grating larger quantities. Never use pre-shredded cheese—the anti-caking agents make your sauce grainy. Pro tip: Grate your cheese over a bowl to catch every last bit for maximum flavor.Baking Dish
An 8x8-inch glass baking dish
is ideal for even heat distribution and easy serving. I use CorningWare because it's heat-resistant and non-reactive. For individual portions, 6-8 ramekins work perfectly—just reduce baking time to 12-15 minutes. Avoid dark-colored metal pans; they can over-brown the breadcrumbs before the cheese heats through. Grease your dish thoroughly with butter or olive oil to prevent sticking, especially if you're making this ahead.Measuring Tools
Precision matters in mac and cheese, so use stainless steel measuring cups and spoons
—they're durable and accurate. For the 2 tbsp flour in the roux, a coffee scoop gives the most consistent measurement. A digital kitchen scale is my secret weapon for the cheese—weighing 2 cups Asiago (about 8 oz) ensures perfect proportions. Don't eyeball measurements; even small variations affect the sauce's texture and flavor.Optional Pro Tools
For the ultimate experience, consider a immersion blender
—it transforms your sauce into a velvety texture without lumps. I use the Ninja Foodi model for its powerful motor. A pasta server makes plating elegant portions effortless, while a fine-mesh sieve helps strain any stray cheese bits if you prefer ultra-smooth sauce. These aren't essential, but they elevate the dish from homey to restaurant-quality in seconds. 💫Nutrition facts
Frequently asked questions
Why does this recipe use both Asiago and cheddar?
The combination creates the perfect balance of flavors. Asiago brings a nutty, slightly sweet depth while sharp white cheddar adds that classic tangy richness. Together, they prevent the sauce from becoming too heavy while enhancing the overall complexity.
Can I make this mac and cheese ahead of time?
Assemble the dish without baking, cover tightly, and refrigerate for up to 2 days. When ready to serve, bake at 375°F for 20-25 minutes until bubbly. For freezer prep, bake first, then freeze in portions for up to 3 months. Reheat in the oven to maintain crispiness.
What's the secret to preventing a grainy cheese sauce?
Always use freshly grated cheese (never pre-shredded) and keep heat low when melting. Whisk constantly and add reserved pasta water 1 tbsp at a time if the sauce thickens too much. The mustard powder also helps emulsify the cheese for a smoother texture.
Can I substitute other cheeses?
For best results, stick with aged cheeses. Parmigiano-Reggiano works in place of Asiago, while Gruyère adds a fruity note. Avoid mild cheeses like Colby—they won't provide enough flavor depth. If using only one cheese, increase to 3 cups for proper richness.
Why does my mac and cheese get watery when reheated?
This happens when the sauce separates during cooling. To fix it, stir in 1 tbsp cornstarch mixed with 1 tbsp cold water while reheating, or add a splash of milk to restore creaminess. For prevention, always let the dish cool slightly before refrigerating, and store it in a shallow container to cool evenly.