
Snacks
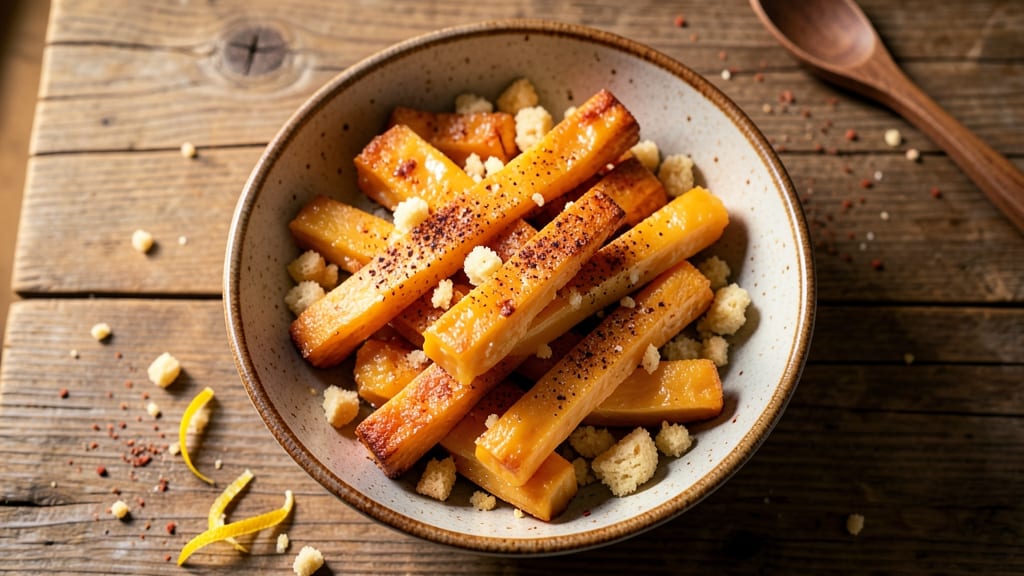
This baked cheddar cheese sticks recipe delivers the perfect combination of crispy golden crusts and gooey, melty centers—every time. The secret lies in a simple dough that wraps around sharp cheddar cheese, creating bites that are addictively crunchy on the outside while staying tender and cheesy inside.
I developed this recipe after years of snack cravings, and it’s become a crowd-pleaser for parties, game days, or whenever you need a quick, satisfying bite.
The process is surprisingly straightforward: mix, roll, cut, and bake. With just a few pantry staples—flour, butter, and of course, cheddar—you’ll have a batch of cheesy sticks ready in under 30 minutes.
The dough is easy to handle, and the shaping technique ensures those coveted crispy edges without sacrificing the melty goodness inside. No fancy equipment or skills required—just follow the steps, and you’ll have a snack that’s impossible to resist.
What makes these cheese sticks truly special is how they transform a basic snack into something restaurant-worthy. The moment they come out of the oven, the aroma fills your kitchen, and the first bite delivers that perfect balance of textures—crispy on the outside, creamy on the inside.
They’re ideal for serving at gatherings, packing for lunchboxes, or enjoying as a quick afternoon treat. Pair them with marinara, ranch, or even a honey mustard dip for the ultimate snack experience.
Once you try these, you’ll never buy store-bought cheese sticks again. The homemade version is fresher, more flavorful, and—let’s be honest—way more satisfying. Let’s get started on creating your own batch of these irresistible bites that everyone will love.
Ingredients for baked cheddar cheese sticks
These simple, crowd-pleasing ingredients create the ultimate crispy-cheesy snack experience—perfect for parties or game day cravings!
| Ingredient | Amount | Notes |
|---|---|---|
| All-Purpose Flour 🌾 | 3 cups | Sifted for light texture |
| Unsalted Butter 🧈 | ½ cup | Cold, cubed for easier mixing |
| Sharp Cheddar Cheese 🧀 | 1 ½ lbs | Block, freshly grated |
| Milk 🥛 | ¼ cup | Room temperature for smooth dough |
| Garlic Powder 🧄 | 1 tbsp | For subtle flavor boost |
| Paprika 🌶️ | ½ tsp | Smoked for extra depth |
| Salt 🧂 | ½ tsp | Kosher or sea salt |
| Black Pepper 🌶️ | ¼ tsp | Freshly ground preferred |
| Egg 🥚 | 1 whole | For binding the dough |
| Baking Powder 🍞 | 1 tsp | For extra crispiness |
| Egg Wash 🥚 | ¼ cup | 1 egg beaten with 1 tbsp milk |
| Sesame Seeds 🌰 | 1 tbsp | Optional for crunchy topping |
The cheddar is non-negotiable here—sharp cheddar from a block (not pre-shredded) melts perfectly and delivers that restaurant-quality flavor. Kraft or Cabot are my go-tos, but any aged cheddar works. For the flour, King Arthur or Gold Medal brands give the best texture, but don't stress if you've got the basics. The butter should be cold when you mix it—take it out of the fridge 10 minutes before using so it's soft but not melted. Pro tip: Grate your own cheese for maximum flavor and to avoid the anti-caking agents in pre-shredded bags.
No sharp cheddar? Extra sharp or pepper jack works in a pinch, but the flavor will be different. Running low on milk? Heavy cream or buttermilk both work, but adjust to taste. The egg wash is key for that golden crust—don't skip it! If you're feeling fancy, add a sprinkle of everything bagel seasoning instead of sesame seeds. For extra crispiness, brush the sticks with melted butter after baking. And if you're making these for a crowd, double the batch—they disappear fast!
The dough keeps well for 2 days in the fridge, wrapped tightly in plastic. For longer storage, freeze the shaped sticks (before baking) for up to 3 months. Bake straight from frozen, adding 2-3 minutes to the time. Once baked, store in an airtight container at room temperature for 3 days—if they last that long! These reheat beautifully in the oven at 350°F for 5 minutes. I always make a double batch and freeze half—game day savior right there.
Why You'll Love This Recipe
- No-Fuss Dough: I swear by this dough—just flour, butter, and milk. No yeast, no waiting, no stress. You’ll have those golden sticks out of the oven faster than you can say “garlic powder.”
- Sharp Cheese Magic: That sharp cheddar? It’s the star. The outside gets crispy while the inside stays gooey—like a hug from a cheese lover. The garlic powder just takes it over the top without overpowering.
- Party in a Flash: Game night, football snacks, or a last-minute kids’ party? These disappear faster than my willpower on a Sunday afternoon. They’re easy to scale—double the batch and thank me later.
- Budget Snack Win: Flour, butter, and cheese are pantry staples that won’t break the bank. Plus, leftovers reheat perfectly—no sad, rubbery cheese sticks here. My wallet and my taste buds win every time.
Step-by-step instructions for crispy cheddar cheese sticks
Here's how to create golden, melty perfection every time—crisp outside, gooey inside.
Mix the Dough for Light, Fluffy Texture
In a large mixing bowl, combine the 3 cups all-purpose flour, 1 tsp baking powder, 0.5 tsp salt, 0.25 tsp black pepper, 1 tbsp garlic powder, and 0.5 tsp paprika. Whisk these dry ingredients together until evenly distributed—this ensures consistent flavor in every bite.
Cut the 0.5 cup unsalted butter into small cubes and add them to the dry mixture. Use a pastry cutter or your fingers to work the butter into the flour until the mixture resembles coarse crumbs with pea-sized butter pieces. This cold butter creates flaky layers that make the cheese sticks extra crispy.
Make a well in the center and add the 1.5 lbs freshly grated sharp cheddar cheese and the 1 whole egg. Pour in the 0.25 cup room temperature milk and mix gently with a fork or dough scraper until just combined. The dough should hold together when pressed but still feel slightly crumbly—this is perfect for our cheese sticks.
Shape and Chill the Dough
Turn the dough onto a lightly floured surface and knead gently just until it comes together. Divide the dough into 24 equal portions (about 1.5 ounces each). Roll each portion into a 10-inch log, sealing the ends to prevent air bubbles. I like to use a rolling pin for smooth, even sticks—this makes them look professional and cook uniformly.
Arrange the cheese sticks on a parchment-lined baking sheet, spacing them 1 inch apart. Cover the baking sheet with plastic wrap and refrigerate for at least 30 minutes (up to 2 hours). Chilling firms up the dough so it holds its shape in the oven and prevents spreading.
While the dough chills, prepare the 0.25 cup egg wash by whisking 1 egg with 1 tbsp milk until smooth. This will give your cheese sticks that gorgeous golden finish. Sprinkle the 1 tbsp sesame seeds onto a small plate—these add a delightful crunchy contrast to the melty cheese.
Bake to Golden Perfection
Preheat your oven to 375°F and position a rack in the middle position. Line a second baking sheet with parchment paper—you'll need this for rotating the sticks halfway through baking. Brush each chilled cheese stick with the egg wash, then immediately roll them in the sesame seeds, pressing gently to adhere.
Place the cheese sticks on the prepared baking sheets, leaving space between them for even browning. Bake for 15 minutes, then rotate the sheets front-to-back and side-to-side. This ensures all sides get equal exposure to the heat. After another 10-12 minutes, your cheese sticks should be deep golden brown with crisp edges.
Here's the secret: the cheese sticks are done when they're firm to the touch but still slightly soft in the center. If they're browning too quickly, tent them loosely with foil for the last 5 minutes of baking. Remove from the oven and let them rest on the baking sheets for 5 minutes—this prevents them from bending as they cool.
Serve Warm for Maximum Enjoyment
Transfer the cheese sticks to a wire rack to cool for 10 minutes—they'll firm up as they sit. Serve them warm with your favorite dipping sauce: marinara, ranch, or even honey mustard. The contrast of crispy exterior and melty, stretchy cheese inside is what makes these cheese sticks irresistible.
Real talk: these cheese sticks are best enjoyed fresh from the oven. The cheese continues to melt slightly as they cool, so don't wait too long to serve. Store any leftovers in an airtight container at room temperature for 2 hours or refrigerate for up to 3 days. Reheat in a 350°F oven for 5-7 minutes to restore that perfect crispy-melty texture.
Pro Tips For Making Baked Cheddar Cheese Sticks
- Preheat Like It’s Your Job: That oven’s been sitting cold for too long—fire it up to 425°F (220°C) and let it scream for 15 minutes before baking. I learned this the hard way when my first batch came out doughy and sad. The cheese needs that hot blast to melt fast and even, or you’ll end up with a chewy, undercooked mess.
- Grate That Cheese Fine: Sharp cheddar’s got texture, and if you’re lazy with the grater, those chunks will turn into sad, unmelted pockets. Use the smallest holes on your box grater—or pulse in a food processor—so every bite is smooth. Trust me, your future self will notice the difference.
- Don’t Overwork the Dough: Once you mix in the milk, stop stirring the second everything clumps together. Overmixing makes the dough tough, and your cheese sticks will turn out dense instead of light and gooey. Just fold it gently—this isn’t bread dough, it’s a delicate balance.
- Roll Them Even: Uneven sticks = uneven baking. Use a ruler to keep them ¼-inch thick and the same length. I used to eyeball it, and half the batch would be underdone while the other half turned into cheese crisps. Precision here means no sad, half-melted sticks.
Storing and reheating this baked cheddar cheese sticks
Room Temperature Storage
Keep your cheese sticks at room temperature for up to 2 hours after baking in an airtight container. I like using a glass Pyrex container with a tight lid to maintain that crispy texture. The cheese will stay warm and melty, perfect for serving at parties or game day gatherings. Just
Refrigerator Storage
For longer storage, refrigerate your cheese sticks in an airtight container for up to 3 days. The cold temperature helps preserve the crispiness, but they may lose a bit of their crunch. I recommend reheating them in the oven to restore that perfect texture. To reheat, place them on a baking sheet and bake at 350°F for 5-7 minutes until they're heated through and slightly crispy again.
Freezer Storage
Freezing is the best way to preserve your cheese sticks for later. Shape the dough into sticks, place them on a parchment-lined baking sheet, and freeze for 1 hour until firm. Then, transfer them to a freezer-safe bag or airtight container.
They'll keep for up to 3 months. When ready to bake, pop them straight from the freezer onto a baking sheet and bake at 375°F for 18-20 minutes, adding 2-3 extra minutes if needed. 💫
Reheating Tips
Oven reheating is my go-to method because it brings back that perfect crispy-melty texture. Place your cheese sticks on a baking sheet lined with parchment paper and bake at 350°F for 5-7 minutes.
If they're straight from the fridge, you might need the full 7 minutes to ensure they're heated through. For a quick alternative, use the microwave on 50% power for 20-30 seconds, but be careful—they can become rubbery if overdone.
Serving After Reheating
Once reheated, let your cheese sticks sit for 2-3 minutes before serving. This allows the cheese to set slightly, making them easier to handle. Serve them warm with your favorite dipping sauce—marinara, ranch, or even a tangy honey mustard.
The contrast of the warm, crispy cheese sticks with a cool dip is pure magic. Trust me, they'll disappear faster than you can say "cheese!" ✨
Nutrition facts
Frequently asked questions
Can I use pre-shredded cheese for this recipe?
Pre-shredded cheese contains anti-caking agents that can prevent the cheese from melting smoothly. For the best results, always grate your own sharp cheddar from a block. If you must use pre-shredded, look for brands labeled "no anti-caking agents" and pat the cheese dry with paper towels before using.
Why are my cheese sticks spreading in the oven?
This usually happens when the dough isn't chilled long enough before baking. The cheese sticks need to firm up in the fridge for at least 30 minutes to hold their shape. If they start spreading, try flattening them slightly with your palm before baking or reduce your oven temperature by 25°F.
What's the best way to make these gluten-free?
Replace the all-purpose flour with a 1:1 gluten-free baking flour blend like Bob's Red Mill. You may need to add 1 extra tablespoon of xanthan gum to the dry ingredients for better binding. Keep all other ingredients the same, but expect slightly different texture—these will be more tender than crispy.
Can I make these cheese sticks ahead of time?
Shape the dough into sticks, wrap them individually in plastic wrap, and refrigerate for up to 2 days. For longer storage, freeze the shaped sticks (unbaked) for 3 months. Bake straight from frozen, adding 3-5 extra minutes to the baking time. The texture will be perfect when reheated!
What's the secret to extra crispy cheese sticks?
Cold butter in the dough creates flaky layers, and the egg wash is your golden ticket! Brush the sticks generously with egg wash before baking, then bake at 375°F on the middle rack. For extra crunch, sprinkle with sesame seeds or everything bagel seasoning right after brushing with egg wash.